””

In stock, ready to ship. Perfect solution for sliding barn door track kit to fit in limited space. Takes 1 7/8" room over door slab to fit complete track and wheel assembly. Ideal applications under low ceilings, basements, duct work obstructions. This complete low profile barn door hardware kit works in spaces that a traditional track won't, and it comes as a complete kit with an extra sturdy one piece track that has a channel design giving it extra strength complemented by custom made matching wheels with ball bearings.

Complete installation instructions here with all drawings, dimensions, & specifications.

Order more than one track kit at a time and get special discounts automatically applied in shopping cart!

Free shipping, yes no cost to you!, for track kits 8' and under in length.

$244.00 USD

Extras


Installation Instructions

  • Read these instructions to the end before starting installation or ordering hardware.

    Reclaimed Lumber Products
    (RLP) warrants this hardware is free of defects and is guaranteed for ten years if installed properly. Customer misusing hardware voids warranty. Hardware
    must be installed correctly in appropriate application with supplied materials. There must be appropriate structural backing and support to hold screws which mount track. Track failure is most likely to happen from incorrect or insufficient attachment of screws to wall. RLP is not liable for any accidents or damage caused by incorrect or insufficient installation. Warranty does not cover normal wear on finish especially where wheel rides on track.

    Track is rated for up to 300 lbs. total hanging on track. Do not allow persons to hang on door and slide on track. All structural support must be solid enough to support load. Attachment only to paneling or wallboard is not sufficient to hold track. Mounting screws must sink into studs or wood headers. A continuous solid wood header is preferred.

    RLP is not liable for any accidents or injury resulting during the installation of this product. Customer and installer should take proper safety precautions when using hand tools and power tools. It is up to the operator to know how to use tools properly, safely, and effectively.

    This hardware is not recommended for exterior installation.

    RLP takes pride in their products.
    Please provide pictures and feedback of your finished product. Thank you for choosing RLP.

  • Track in the length that you ordered

    Lag screws. Here are the recommended numbers of lag screws for each length of track: 6’, 5 holes; 7’, 6 holes;
    8’, 7 holes; 105", 7 holes; 10’, 8 holes; 12’, 10 holes; 13’, 10 holes; 14’, 11 holes; 20’, 15 holes.

    End stops: two 5/16” x ½” button bolts with acorn nuts.

    Two carrier/ hanger assemblies. Note axle bolt is in the hole that is 3/4" from the top of the hanger plate. Additionally there should be four 3/8” bolts, eight washers, and four acorn nuts to mount hanger plate to door. Door mounting bolts are usually 1/2" longer than the thickness of the doors.

    3” long x 1” tall floor guide and two mounting screws.

    Two wood 5/16” thick x 1 1/8" wide spacer blocks for setting carrier assemblies on door to drill for mounting holes in door.

  • 3/16” allen wrench

    9/16” & 5/8” socket or wrench

    5/16” or 3/8” nut driver for drill or socket for mounting lags depending on which lag came with kit; silver lags are 3/8”

    Drill: 5/16” drill bit to drill mounting holes in track, 1/8” drill bit to pre-drill for lags and floor screws, 3/8” drill bit for boring holes in door

    Level

    Pencil      

    Tape measure

    Stud finder

    Philips screwdriver or bit for drill for floor guide screws

    1/4” slotting cutter and router or circular saw for slot for floor guide

    Step ladder

    Clamp

    Safety glasses and other proper safety equipment and precautions

  • Clearances Needed

    1 5/16” to centerline of wheel from wall on track puts the back of a 1 ¾” thick door at roughly 7/16” off wall with bolt heads barely clearing. 2 ¼” thick door is 1/16” off wall, and the bolt heads will not clear unless you countersink or install a ledger. These measurements are from the back of the track which mounts to the wall. Make sure that the back of the door and bolts will not rub on any trim, thermostats, pictures or anything within the full range of opened and closed door positions. If you do not have enough clearance, you can also add a ledger board behind the track as a spacer; make sure this is securely mounted so as to not compromise the attachment of the track to the wall. An 1 3/4" thick door or thicker will not work without a spacer behind the track or additional spacers added between hanger and wheel if there is any trim or other obstructions for bolts to rub. Bolts will need to be countersunk into back of door or add spacers.

    The default setting to centerline of wheel is 13/16” from back of hanger. Move washers around on axle if necessary to have center of wheel from back of hanger plate to be half the thickness of your door so the door is centered front to back under the wheel. One can also adjust how well the door hangs plumb by moving the spacers on the axle, but make sure both wheel assemblies match. You can add extra washers on the axle assembly if you like. You can use the two 3/8" washers that go under the bolts on the back of the door. If door is hanging to where bottom of door is leaning into the wall remove spacers between wheel and hanger.

    Floor guide will be necessary to make door hang plumb. One can move the spacers as you wish by taking spacers out between wheel and hanger plate moves door closer to wall, and adding spacers in front of wheel increase the clearance behind the door or between the door and the wall. Be sure when reassembling hanger assembly that the axle bolt goes in the top hole which is closest to the end at 3/4" to center from edge.

    Clearance under the door is recommended ½” - ¾”. Over the top of the door slab 1 7/8” clearance is needed for wheel to spin freely.

  • We recommend a minimum of 1” of overlap on all three sides.

    More overlap ensures the door will cover the opening better and not allow as much gap to show around the edges even if not shut fully.

    To calculate door slab width on single door add overlap on each side times two plus inside dimension of opening.

    To calculate door slab width on pair of doors take half of inside dimension width and add one side of overlap dimension for each door slab.

    When sizing doors you may want to consider our track length options. It makes for simpler install if the track length is exactly twice the width of your barn door.

    To calculate door slab height take inside opening height subtract desired gap under door and add desired overlap on top. This could place the track over any trim that is over the top of the opening. Either the door slab needs to be adjusted in height so track can go above trim or trim needs to be flat and fully extend for full width under track so track can be mounted on trim.

    Note all these dimension are easier to calculate if opening is just a sheetrock opening with no trim. You need to consider what the trim will look like with door in open and closed position. How much of the trim do you want showing if any at all?

    For door height be sure to consider where the mounting lags need to go for mounting the track to the wall. They will be centered about 1 3/16" over top of door slab. Be sure there is proper backing and load support for lags to attach to at these points.

  • Installation Steps

    1
    2
    3
    4
    5
    6
    7
    8
    9

    Customizing and sizing track lengths.

    Typically the track length is twice the width of the door. Sizing doors in increments that work exactly with standard track length makes the process simpler such as using a 3' door with a 6' track. Using our default guidelines have the track length exactly twice the width of the door slab puts the edge of door at end of track in fully open or closed positions and also the edge of door exactly in the middle of the track in both positions.

    If you are doing double doors on a single opening where each door stops in the middle of the opening with one door opening to the left and one door opening right then treat that application as two different openings where you buy one complete track kit for each door. The tracks will butt up to each other in the middle of the opening and the doors will each install and operate on their own respective track. The wheels will not pass over the joint in the middle of the opening. It is generally a better value to ship and purchase shorter length tracks like previously described. Alternatively if you want to install more than one door on a track then you can purchase the item titled "hardware kit to mount door on existing low profile mini V track"; this includes all components that come in a normal track kit except of the stick of track itself.

    If your track length is going to be exactly twice the width of the door and you want the end of the track to be the edge of the door in the fully open and fully closed position you can skip ahead to step #2.

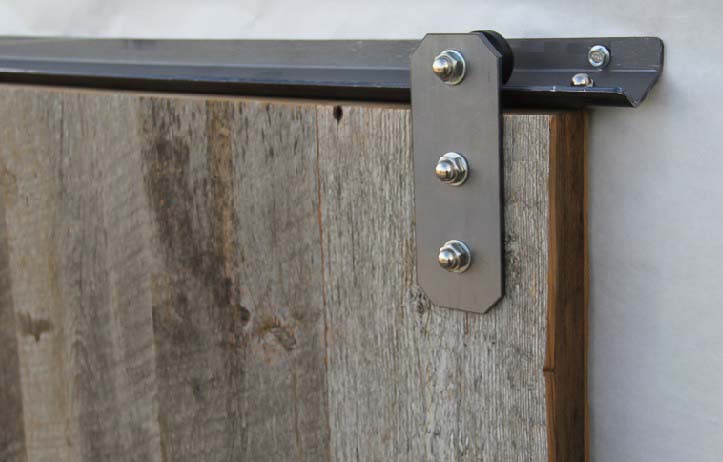
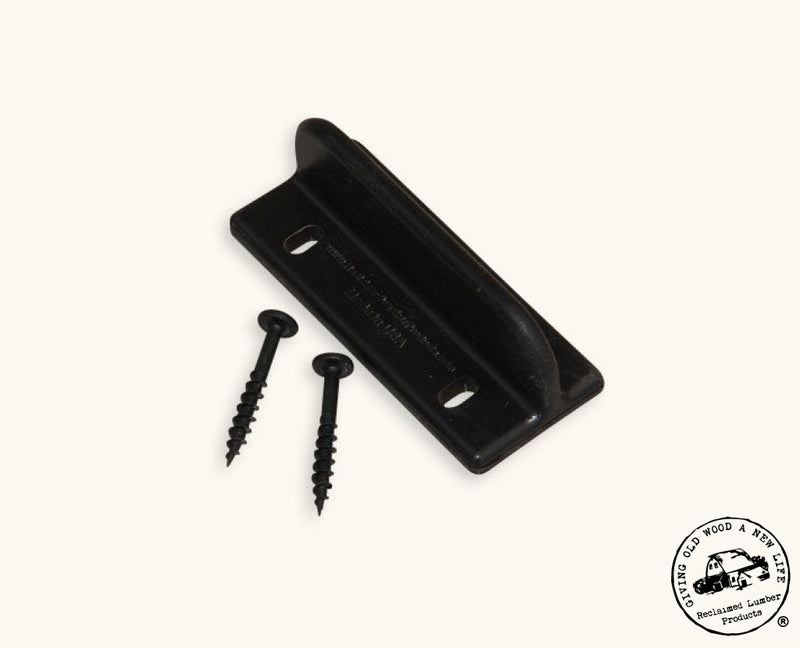
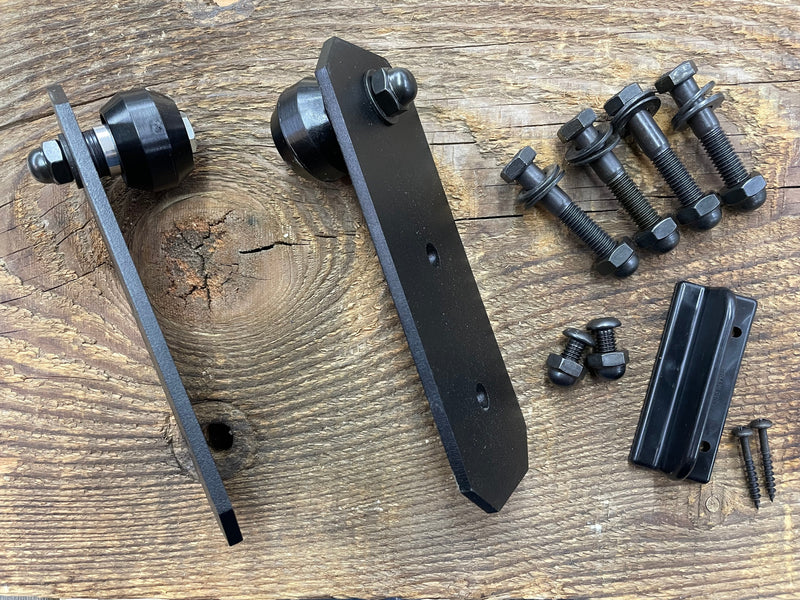
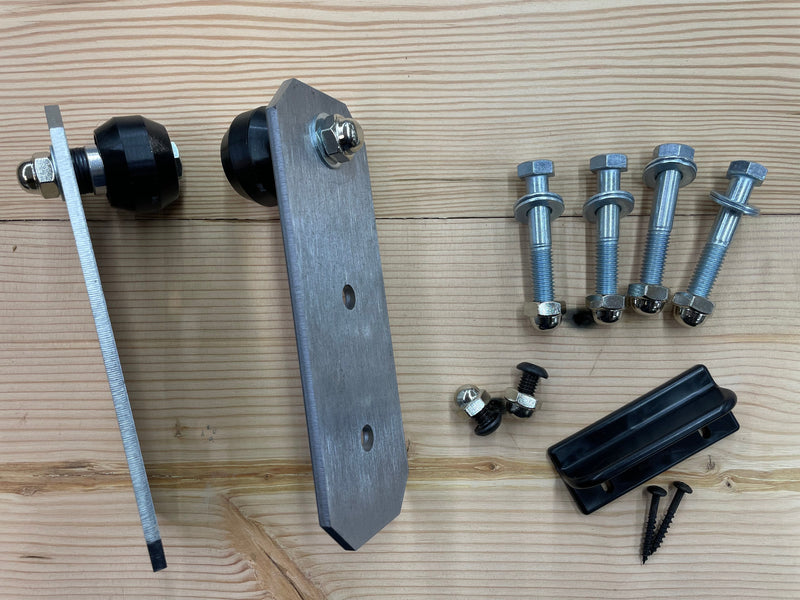
    If you mount centerline/bolt holes of carriers 2 3/8” in from edge of door which is the same thing as edge of hanger plate 1 1/8" from edge of the door, this will have edge of door stop flush at end of track based on predrilled stop holes in track. The stop bolt hole is drilled 1 1/2” in from end of track to center of hole. Utilizing our predetermined wood spacer block with edges of carrier 1 1/8" from edge of door (bolt holes 2 3/8" from edge of door is center of carrier) will allow for a track to work that is exactly twice the dimension of the door slab. Here is a formula you can plug in different values if you like to calculate track length: (Door Width) + (Distance From End Of Track To Center Of Stop Bolt Hole) - (Distance From Edge Of Door To Center Of Carrier) + 0.875” = Track Length / 2   For double doors on a single piece of track just don’t divide the formula by 2 at the end.

    To make the track function differently you can change any combination of variables such as where you mount the hangers relative to edge of door, redrill stop hole, or cut the track to a different length.

    If your track is more than double the width of your doors and you don't want to cut it down the simplest fix is to have the end of track flush at edge of door in closed position and run the track wild or long in the open position where you will redrill the one stop hole there.

    If your door is an 1" too wide for your track such as a 37" door on a 6' track the simplest solution is to just redrill both stop holes 1/2" in from end of track. Then use default wood blocks to mount hangers. Center the door on the opening but hold the start of the track 1" in from the edge of the door.

    You can plug different scenarios into the above formula to calculate all different options to make the track work for your door size.The 5/16” stop hole can be re-drilled in another spot if would like to change mounting points or have doorstop indifferent spot on track. For example you could redrill 5/16 holes 3/4”in from end of track and still mount carriers 1 1/8”in from edge of door; this would allow you to use a 48 ¾” door with an 8’track(48.75 +.75 -2.375 +0.875 = 96 /2); with this option your door would stick past the end of the track ¾”.Also you could mount the carriers 4.375” to center of carrier and utilize an 8’ track for a 50” wide door without changing stop holes (50 + 1.5 – 4.375 + 0.875 = 96 / 2). Make sure to consider how the carriers will look in relation to the frame on the door regardless of where you choose to mount them. On double doors with a single track you can also add extra stop bolts in center of track to make sure doors stop in the middle.

    Default option if track length is twice the width of the door

    Using supplied wood blocks, flush one piece up against edge of door to get distance of 1 1/8” from edge of door to edge of carrier bracket and the other piece flat against top of door. Then hold complete assembled carrier with wheel attached tight to edge of piece on face of door and wheel tight to piece flat on top of door. The dimension from bottom of wheel to top of door is critical that it stays this recommend gap of 5/16” (the thickness of the wood). This is a safety and proper functioning issue. This gap makes sure that the door and carrier assembly fit on track properly, slide smoothly, and do not “jump off” track. Holding these three pieces secure, temporarily clamp carrier/ hanger assembly to door making sure to leave two bolt holes clear. Make sure to have wheel side of carrier facing to center of door and verify that carrier’s metal strap is square to door.

    NOTE: A hint to make install more accurate and simple would be to use the hanger plate as a template on the side of the door that you intend to mount the hanger to at final installation. If you happen to drill from the wrong side of door it may not mount as well because you potentially could drill the holes at an angle which will make the holes in the wrong place on the other side of the door.

    Use 3/8” drill bit to drill both mounting holes in the door slab using the steel hanger plate as a guide. Be sure to drill straight and perpendicular to door face. Now repeat procedure for the second hanger.

    Decide how you want the floor guide to be installed.

    If you want the alternative option shown in picture with double guides, be sure to order an extra floor guide. Otherwise cut a 1/4” wide kerf centered in bottom of door. To determine depth of kerf cut, subtract desired gap under door from 1” and add at least 1/16”, so for a ½” gap under door you would have a 1/4” wide and 9/16” deep slot/ kerf. This is easiest to do with a router and a slot cutter, or you can clamp a straight edge onto a handheld circular saw and make multiple passes to create the dado.

    NOTE: These dimensions for installing the floor guide are in perfect scenario with tight tolerances. If there is a chance your floor is not level you may want to increase the depth of the slot in the door so the door can move freely over floor guide.

    At this point you may want to consider painting, staining, or finishing your door slab if necessary. Allow proper curing before handling door.

    Mark top of track on wall.

    Determine distance from floor to top of track by adding gap under door (usually 1/2") + height of door slab + 1 5/8” (reference drawing at beginning of instructions). This top of track mark will line up with vertical top piece on back of track that mounts to wall. Mark this measurement on wall on each end and center of track location. Verify and adjust if need be with a level. This top of track mark is not the top of the wheel; the top of track is slightly lower than the top of the wheel.

    Note you want track installed level, but floor may not be level. Verify height points from floor along full length of track to be sure you have proper clearance. Keep track level and raise height if need be to get clearance so door doesn't rub on floor. Also be sure that floor guide will reach door properly after setting height of track.

    Mark where end of track will be. You may want to refer back to step #1 for this point. In a normal situation where the length of track is exactly twice the width of the door then the end of the track is the edge of the door slab in the fully opened and fully closed positions. In this example center the door slab on the opening and the edge of door slab would then be the end of the track.

    If you have solid, structural, and continuous backing for the full length of the track then you can evenly space the mounting holes for the lag screws. Otherwise, locate all mounting points within full length of track on wall. Use stud finder if need be and mark each point on wall that is going to be a mounting point. With extra set of hands hold track up against wall and transfer mounting hole marks to track. If you cannot hold track up against wall, measure from one constant end to each hole. We recommend a minimum of five lags per section of track and spacing of around 16”. Before drilling track be sure that you are drilling in the correct leg of the track that is supposed to be mounted to the wall. Both legs look similar. The bottom of the track has the stop bolt hole closest to it. The leg section that you will drill for the wall lags is furthest from the stop bolt holes and in the longest leg. Drill 5/16" diameter holes from backside of track that faces wall so you do not mar the finish. It is best to begin hole with a small drill bit for ease of starting before using 5/16 drill bit. Center holes 3/8” down from top of track (reference drawing at beginning of instructions). Remember all mounting holes need to be in structural support. With drilled track verify it matches mounting points mark on wall.

    Install first lag screw in the center of the track; be sure top of track mark on wall lines up with top of track. Note tracks have slight bow which you need to remove as you install lags to the wall. Be sure that your top of track marks on wall are straight and level; be sure to mount the track to these marks. Do not install track with any bow left in it. After installing first lag in center of track pull down gently on each end to straighten track, then you can predrill with 1/8” bit all holes and install all lag screws checking to be sure track is still straight and level with each hole.

    Install stop with 5/16 x ½” button head bolt and acorn nut in one end of track. Be sure head of bolt faces down and acorn nut faces up in valley that wheel rides. Leave most accessible side of track open.

    Technical diagram of a track mounting system with measurements and instructions.

    Bolt carrier with 3/8” bolts to door.

    Use acorn nuts on front, hanger side of the door. Make last minute adjustment if necessary for how the door is going to hang on the wall and clearances needed. Washers on axle can be moved behind or in front of wheel to change clearance from wall for relationship distance of back of hanger/ carrier to center of track and wall. This also can help adjust a door to hang more plumb. If you do not have room behind door for clearance over trim you could remove the washer under the bolt head that goes into the back of the door. Normally the bolts to mount the hangers to the door are 1/2" long than thickness of door. If you would like to countersink the bolts so the head is flush with the back of the door then substitute in bolts that are only 1/4" longer than the thickness of your door slab. Be careful that floor guide is centered front to back on door if you make any adjustments in the axle assembly and the door remains hanging plumb.

    Slide door onto track on free end of track without stop bolt. Install other stop bolt. If the end of the track is not accessible, take the wheel and axle off the carrier assembly, prop door under track in position as if hangers were installed, and re-attach wheel and axle with spacers onto back of hanger plates after door is sitting in position at correct height below track. Do not slide or operate door without both stop bolts installed in each end of track.

    Install floor guides.

    Make sure you are happy with the clearances behind the door, and it will slide smoothly. Are finished moving spacers around on the axle assembly?

    Shim between door and wall so that the gap behind the door appears consistent top to bottom the door is hanging plumb. Then install your floor guide(s) so that door stays plumb. Floor guide should be half covered by door left to right when the door is in the fully open or fully closed position. If you use epoxy to glue floor guide to masonry floor it is a good idea to rough sand the bottom of the floor guide so the glue adheres better.

    At this point if the floor guide doesn't fit because there isn't room for it to fit into the slot on your door the simplest fix may be to use a file to shorten the floor guide, or you have to cut the slot deeper.

    Congratulations; you did it! Enjoy. It will last a long time.

  • Lowest clearance barn door track hardware design available! This barn door hardware requires less than 2" of room to operate over the top of your door slab. This track kit is the ideal solution to fit in places where you have limited room & space in the gap over the top of your sliding door. Note the requirement for 2" of clearance is over the top of the moving door slab and not the door opening. If you install barn door with 1/2" gap under door then the exact height from the floor to the top of the wheel is door height plus 2 1/4" from the floor.
  • Ideal for applications where crown molding, ductwork, or low basement ceilings get in the way of mounting your sliding door. Do you have low ceilings; our mini V track can fit in tight spaces over the barn door. This is your solution for a quality product made to fit in a tight spot.
  • Unique proprietary design made by Reclaimed Lumber Products in the USA! Only available to purchase here in our online store.
  • Quick shipping. All options shown are in stock and ship right away.
  • Custom shape glass filled nylon wheel glides effortlessly and quiet with sealed ball bearing.
  • Adjustable spacing to centerline of wheel on hanger assembly.
  • Most secure and safe barn door track system available. If hanger assembly is mounted with our setup blocks that are provided with kit which set the proper gap between wheel and door, it is impossible for wheel to jump out of track or door to come off. Our special channel design captures the proprietary wheel.
  • Channel design is stronger than most flat track systems.
  • Complete kit comes with all mounting bolts, lags, guides, and stops to mount barn door.
  • All lengths shown ship as one piece of track with no splices! One piece, long length track kits up to 20' are in stock. Note this unique feature where all tracks are shipped as one full length piece in the exact length that you order; compare to many competitor tracks that ship as short lengths where one must splice pieces together on installation. These long length tracks are usually intended for mounting extra wide single doors such as 6' wide door on a 12' track kit. Note you can add the extra hardware kit to mount a second door to a single track kit such as two 24" doors with an 8' track kit and the extra hardware kit. Kits longer than 8' have much more expensive shipping costs. If mounting two doors such as two 3' doors that each stop in the middle of the opening a better option is two complete 6' track kits rather than the 12' kit with the extra hardware kit. If a pair of doors has one opening left, one right, and will not roll over the joint in the tracks then the two separate tracks are a better value, and you do not need the extra expense of the long single piece track.
  • All steel parts precision cut with laser and channel track formed with CNC press brake to accurate, repeatable tolerances.
  • Reference this article to compare features of the different track hardware kits that we offer. This is our smoothest operating wheel and quietest ride of all the barn door track kits that we sell.
  • Order with one of our reclaimed wood barn door slabs to get an additional $85 discount off our normal price.

  • Single 3/8" ball bearing molded into wheel.
  • Channel is made from 10 gauge (0.135") formed mild steel. Note this track is smaller and lighter gauge than our original heavy duty V track system also available in our online store.
  • 375 lb. capacity per rail.
  • Needs 1 7/8" of clearance over top of door slab to easily operate and move.
  • All sizes of track shown here are shipped as one continuous piece in the length you choose.
  • All track is shipped with stop bolt holes predrilled in each end. Lag mounting holes for attaching track to wall are not predrilled. Customer will need to drill these mounting holes in track for attaching it to wall.
  • Distance from back of track to centerline of wheel is 1 5/16". Doors thicker than 2" or where obstacles for clearance such as trim existing around opening may require additional spacer/ ledger board mounted behind track.
  • The hangers are 6 5/8" tall and extend down from the top of the door 4 7/8". The precision laser cut hanger is 2.5" wide and made with 3/16" thick plate steel.
  • All mounting bolts supplied are 3/8" diameter and 1/2" longer than the thickness of your door. This is the only difference in the track kits when you specify the thickness of your door. If you have a door thickness different than shown as an option you can substitute different length bolts with 3/8" x 16 thread. If you choose to countersink your mounting bolts than they should be 1/4" longer than the thickness of the door.
  • Available in lengths from 5' through 20' long.
  • Read page 6 of install instructions to determine your track length. Normally one should order track length as twice the width of the door but there are many ways for you to customize installation.
  • Only available in unfinished and black colors. The black has the track and the hanger plates powder coated in textured black. Note the raw unfinished steel has lots of variation in color. It comes from the steel factory in colors from shiny silver to dark gray. There is no sealer coat, cleaning or buffing done to the raw steel. It can tarnish and rust. It may already have rust pitting, oil, grease, factory mill scale, or other surface discoloration on it because no cleaning or processing has been done to the raw steel. Most customers who order the unfinished color intentionally do this because they intend to finish it themselves with another color, like the industrial look, or want to rust the steel. The unfinished steel may also have scratches and tooling marks left on it from the forming and cutting process.

  • Use a commercial address on checkout to get the cheapest shipping rates. Refer to our installation instructions on page 6 to size track length. Longer length tracks have significantly higher shipping costs.
  • Track has stop holes predrilled. No lag mounting holes are drilled in track.
  • Normally you should order track length twice the width of your door. If you need length of track different than what is available in our online store you can order track and cut to length or follow the instructions on page 6 to make accommodations for different scenarios. We do not custom cut to length; the only lengths we offer are shown here in increments from 5' - 20'.
  • 1/4" timber lag screws in the quantity matched to length of track you ordered.
  • Two end stops.
  • Single floor guide is black, 3" long, 1" tall, and made with 3/16" thick glass filled nylon. Floor guide is meant to be screwed to floor with two black #8 screws supplied (alternatively could be epoxied to floor or over concrete customer may need to supply concrete anchors), Recommendation is to mount door 1/2" off floor.
  • Two carrier assemblies which include hanger plate; axle; spacers to adjust depth of wheel; single ball bearing in glass filled nylon wheel.
  • Four mounting bolts corresponding to your thickness of door at 1/2" longer than thickness of door; washers and acorn nuts.
  • Unfinished color comes with zinc fasteners and black comes with black fasteners.
  • Two wood spacer blocks for mounting hanger correctly on door slab and drilling mounting bolt holes.
  • Not included - Installation, door slab, handle, privacy lock, or tools.
  • No anti-jump blocks are necessary because of the special channel design of track and installation method with setup blocks.

  • Two color choices standard: raw unfinished steel along with textured powder coat black. Please note that these pictures are of the actual product but the color may look different in person than on this screen. Also note that we make no representation that our color name matches any other manufacturer's color. All floor guides are black nylon.
  • Custom colors can be requested but are usually cost prohibitive for only doing a few tracks at a time. 
  • We only offer lengths shown here; we do not custom cut to any other lengths except for very large orders. Note installation instructions for options you can do to create other lengths such as easily cut the track shorter, move the stop holes at the end of the track, or locate the hangers on the door slab at a different spacing from the edge of the door than our default recommended distance.
  • If you are doing two by-parting doors that each stop in the middle and one track, order kit for 2nd door on single track. For example this would be mounting two 2' doors on a single 8' track. In this example one would order one 8' track kit and one extra complete rectangular hanger hardware kit to mount door on existing track. Alternatively for larger doors with one opening to the left and one to the right such as two 3' doors just order two complete 6' track kits.
  • This sliding barn door track kit sold here can be used as a top mount or ceiling mount low clearance barn door hardware. Custom brackets can be made to mount track to ceiling above rather than wall behind track. The simplest option for you to do ceiling mounted track is for you to order our standard low clearance sliding barn door kit here in the online store, and you can source your own angle iron (the angle iron does not come with this kit) to make a bracket to mount the track tight to the ceiling. Then the track channel can be mounted close to the ceiling with minimal clearances needed. Attach the horizontal leg of the 90 degree angle iron to your ceiling and bolt the vertical leg of the angle iron to the vertical plumb leg of the track that would normally attach to the wall. The angle iron is a 90 degree piece of steel with two legs that are each about 1" long and is available as a standard stocked item at most steel suppliers and building supply stores. You can also use this option to span across hallways or openings where there is no header in between two walls that you want to mount the barn door track on. This ceiling barn door track is a great solution for basements and low ceilings.

  • RLP warrants this hardware is free of defects and is guaranteed for ten years if installed properly.
  • Customer misusing hardware or not following installation directions voids warranty.
  • Warranty does not cover normal wear and tear especially on finish.
  • All products sold by RLP are non-refundable and non-returnable.

Video